Help

Help Center

Complete documentation for the Cocktail-O-Matic platform — covering the Pi machine, Cloud Portal, and Cashier PWA.

Pi Machine — User Guide

The Cocktail-O-Matic Pi application runs on a Raspberry Pi and controls your cocktail machine. It has two main interfaces: the Guest experience (for ordering cocktails) and the Admin panel (for managing the machine).

Installation & Setup

Prerequisites & Requirements

Before installing Cocktail-O-Matic, make sure you have the following: Python 3.11 or later, Node.js 20 or later, and at least 2 GB of free disk space. For production use, a Raspberry Pi 3 B+, 4, or 5 with at least 1 GB RAM is supported (4 GB recommended). For development and testing, any machine running Linux, macOS, or Windows will work. You will also need an internet connection for the initial setup and package downloads.
Tip

On a Raspberry Pi, we recommend a 32 GB or larger microSD card (Class 10 / A2) for best performance and enough space for recipes, images, and logs.
Install on Raspberry Pi

This is the primary target platform.
  1. Flash Raspberry Pi OS Lite (64-bit, Bookworm) onto a microSD card using Raspberry Pi Imager.
  2. Boot the Pi, connect to WiFi, and open a terminal.
  3. Run the one-line installer:
    curl -fsSL https://get.cocktail-o-matic.com | bash
    This installs all dependencies (Python, Node.js, system packages), downloads the latest release, and configures auto-start on boot.
  4. After installation, the Pi reboots and the Cocktail-O-Matic interface opens automatically in kiosk mode.

The entire process takes under 15 minutes.

Tip

Enable SSH before first boot (in Raspberry Pi Imager settings) so you can install remotely without connecting a keyboard and monitor.

Install on Windows

Windows installation is intended for development and testing — not for production pump control.
  1. Install Python 3.11+ from python.org (check 'Add to PATH' during setup).
  2. Install Node.js 20+ from nodejs.org.
  3. Clone the repository:
    git clone https://github.com/actabi/Cocktail-O-Matic.git
  4. Start the backend:
    cd pi/backend && pip install -r requirements.txt && python run.py
  5. Start the frontend:
    cd pi/frontend && npm install && npm run dev
  6. Open http://localhost:5173 in your browser.

GPIO and pump hardware features are simulated on Windows.

Tip

Use VS Code with the Python and ESLint extensions for the best development experience on Windows.

Install on Linux / macOS

Linux and macOS are great for development and testing.
  1. Install Python 3.11+ using your package manager (apt, brew, dnf, etc.).
  2. Install Node.js 20+ via nvm, brew, or your package manager.
  3. Clone the repository:
    git clone https://github.com/actabi/Cocktail-O-Matic.git
  4. Start the backend:
    cd pi/backend && pip install -r requirements.txt && python run.py
  5. Start the frontend:
    cd pi/frontend && npm install && npm run dev
  6. Open http://localhost:5173 in your browser.

On a native Linux machine with GPIO support, pump control works the same as on a Raspberry Pi.

Tip

On Linux with GPIO hardware (e.g., Orange Pi, Jetson), install the RPi.GPIO-compatible library for your board to enable real pump control.

Guest Experience

Guest — Cocktail Menu

The main guest screen displays all available cocktails in a beautiful photo grid. Each card shows the cocktail name, image, and category. Cocktails that cannot be made (missing ingredients) are dimmed or hidden based on settings. Tap any cocktail to see its details and order it.
Tip

Use the filter bar at the top to filter by spirit (Vodka, Rum, Gin...), alcohol-free, or taste profile. The 'Available only' filter hides cocktails with missing ingredients.

Guest — Cocktail Detail & Ordering

The detail view shows the cocktail description, ingredients list (with quantities), and a large photo. You can adjust the serving size (glass vs shaker) if configured, and see the price if pricing is enabled. Tap 'Order' to start production. If an ingredient is out of stock, a swap option may appear suggesting an alternative.
Tip

In party mode, guests can add multiple cocktails to a cart with degressive pricing. The strength selector lets you adjust alcohol level.

Guest — Production Progress

After ordering, a real-time animated progress screen shows the cocktail being made. Each production step is displayed: which pump is dispensing, the ingredient name, and the progress bar. Manual steps (like adding ice or garnish) show instructions for the bartender. When production finishes, the screen shows a completion animation.
Tip

The progress view uses WebSocket for real-time updates — you see the exact ml being dispensed live.

Guest — Party & Kiosk Mode

Party mode is a simplified guest interface designed for events and self-service. It removes admin access and shows a clean ordering flow. Kiosk mode makes the Pi boot directly into the guest interface full-screen, perfect for unattended machines. A QR code can be displayed so guests order from their own phones.
Tip

Party mode supports multi-cocktail ordering with a cart, degressive pricing, and multiple payment methods (cash, card terminal, NFC wristband).

Guest — Payment Flow

When pricing is enabled, guests see cocktail prices and can select a payment method before production starts. Supported methods include: free (no payment), cash, card terminal (CB), and NFC cashless wristband. For card terminal payments, the Pi communicates with the connected payment terminal. For NFC, the guest taps their wristband to deduct from their prepaid wallet.

For NFC wristband management, see Scan Wristband in Cashier PWA.

Tip

Multi-cocktail orders get degressive pricing — the more cocktails in one order, the better the per-unit price.

Guest — Bottle Refill

When an ingredient runs low or empty, guests (or staff) can trigger a refill without accessing the admin panel. If a refill PIN is configured in Settings, enter the PIN on the numeric pad. Then select the bottle size (default 700ml) and confirm. The filling level is reset to the new amount. This is useful during events when admin access isn't practical.
Tip

Set a refill PIN in Settings → Guest Screen to prevent unauthorized refills while still allowing quick bottle changes.

Guest — NFC Balance Check

When NFC payments are enabled, guests can check their wristband balance directly from the cocktail screen by tapping the balance icon in the top-right corner. Scan the wristband to see the current balance, which cocktails you can afford, and how much more you'd need for others. No staff intervention required.

See Wallet Detail in Cashier PWA for top-up and refund operations.

Tip

The balance check also shows affordable cocktail suggestions — useful for guests deciding what to order with their remaining credit.

Exiting Kiosk Mode

In kiosk mode, the Pi boots directly into the guest cocktail screen with no visible admin access. To exit kiosk mode and return to the admin login: use the keyboard shortcut Ctrl+Shift+A, or tap 5 times rapidly in the bottom-right corner of the screen. This opens the admin login page.
Tip

Train your event staff on the 5-tap gesture — it's the quickest way to access admin when a keyboard isn't connected.

Administration

Admin — Dashboard

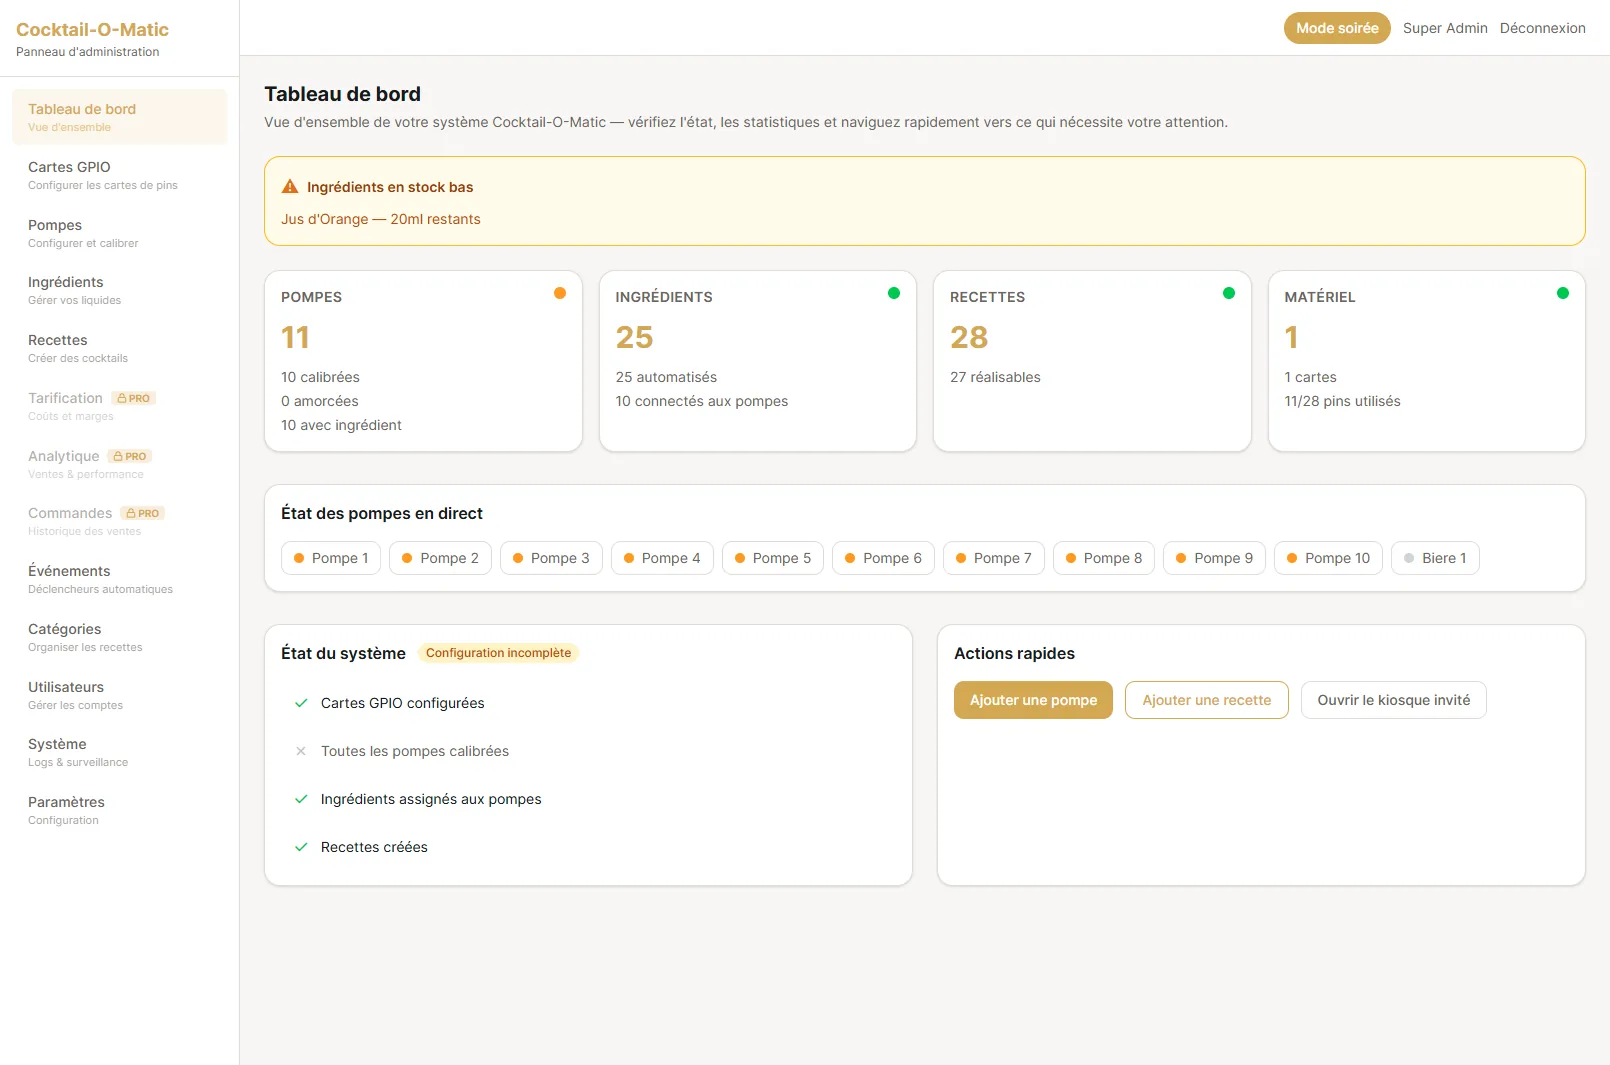
The admin dashboard gives an overview of your machine: pump statuses with filling level gauges, recent production activity, quick access to all admin sections. Each pump card shows the connected ingredient, current fill level (as a visual gauge), and a status indicator (ready, empty, error).
Tip

The dashboard updates in real-time via WebSocket — pump levels decrease as cocktails are produced.

Admin — Pump Management

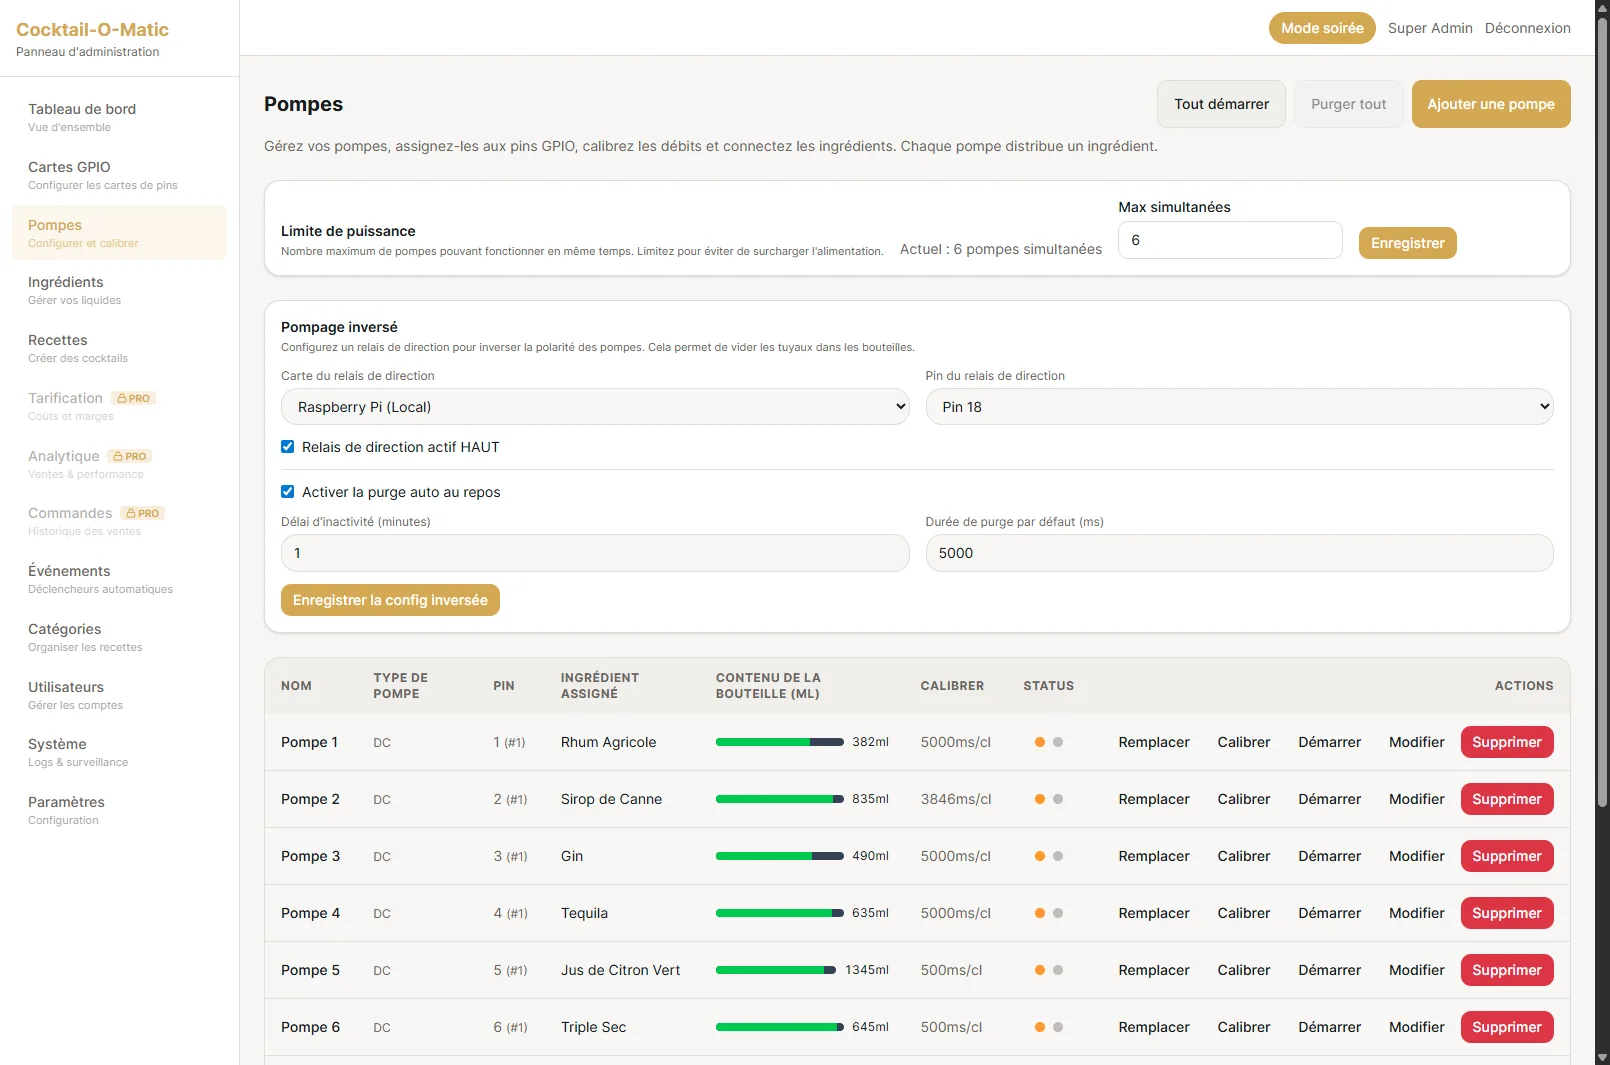
Manage all connected pumps: add/edit/delete pumps, assign GPIO pins, set pump type (DC, stepper, valve), configure flow rate, tube volume, and capacity. Each pump can be individually tested (run forward/reverse), calibrated, and primed. Bulk operations let you run all pumps or reverse all pumps at once for maintenance.
Tip

Use the calibration wizard to fine-tune flow rates — it dispenses a test volume and you enter the actual measured amount to auto-calculate the correction factor.

Admin — Ingredient Management

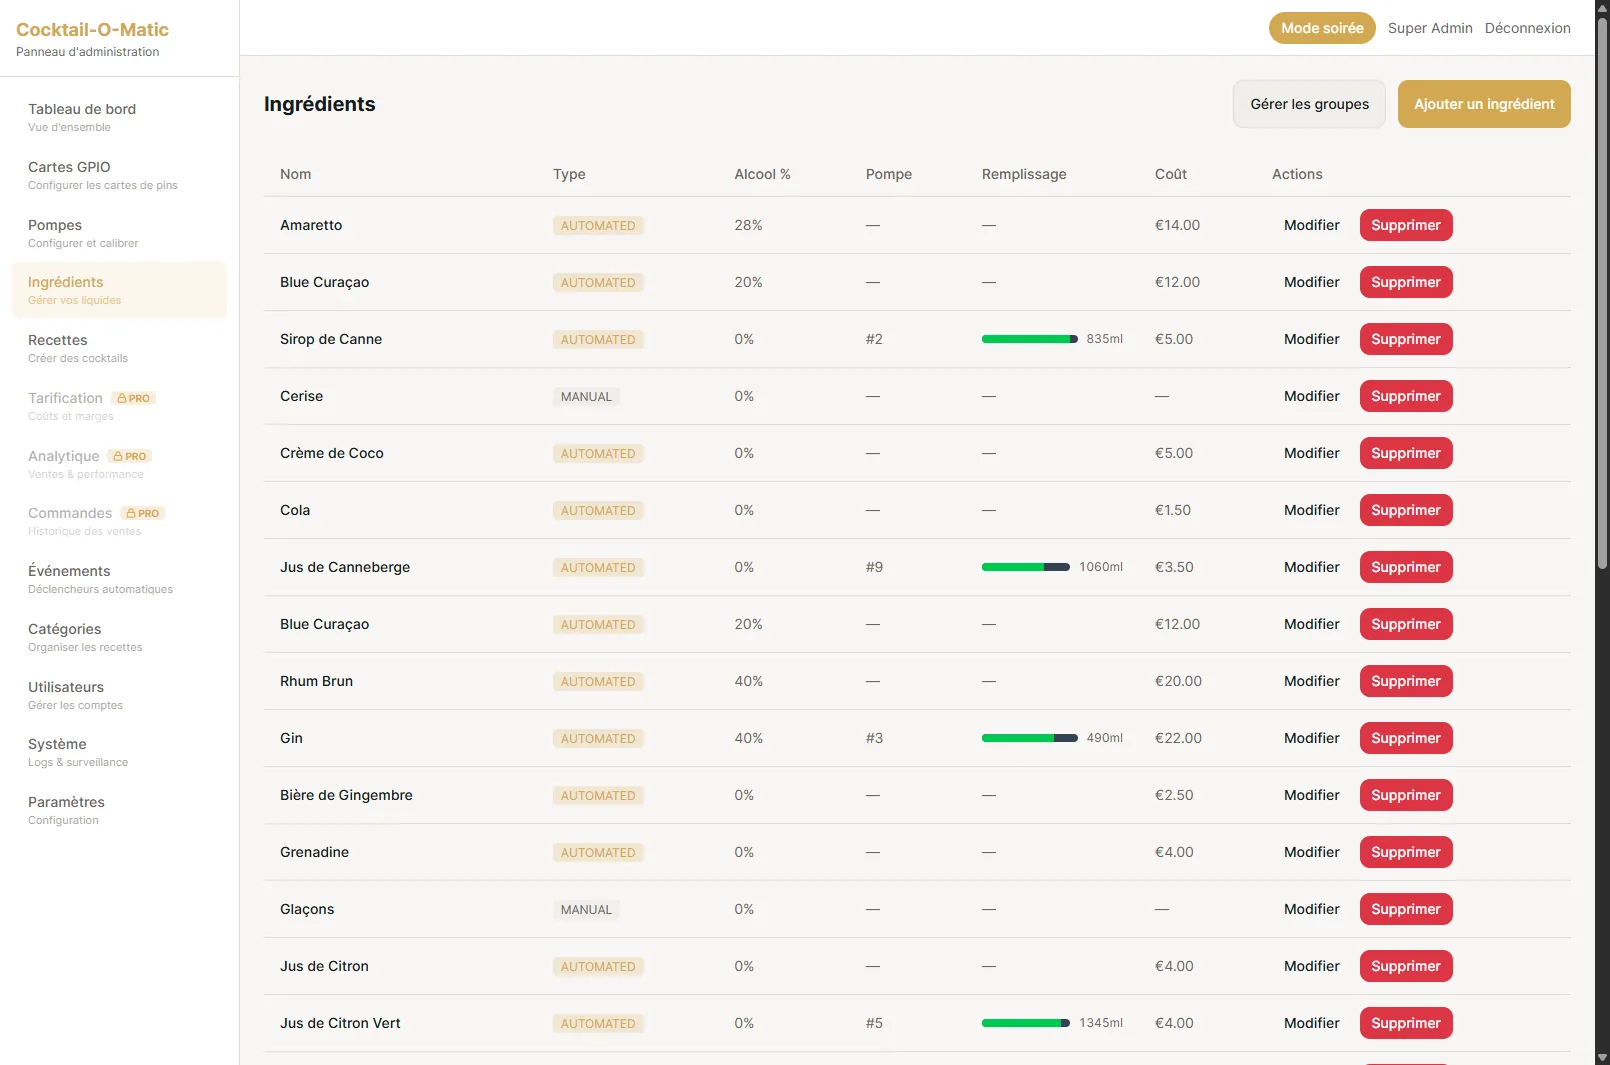
Create and manage ingredients: name, type (spirit, mixer, syrup, fresh...), cost per unit, and optional image. Ingredients are linked to pumps — once an ingredient is assigned to a pump, it becomes available for recipes. Ingredient groups allow automatic substitution (e.g., any cola brand can substitute for another).
Tip

Set ingredient cost to enable automatic cocktail cost calculation and margin tracking in the pricing dashboard.

Admin — Recipe Management

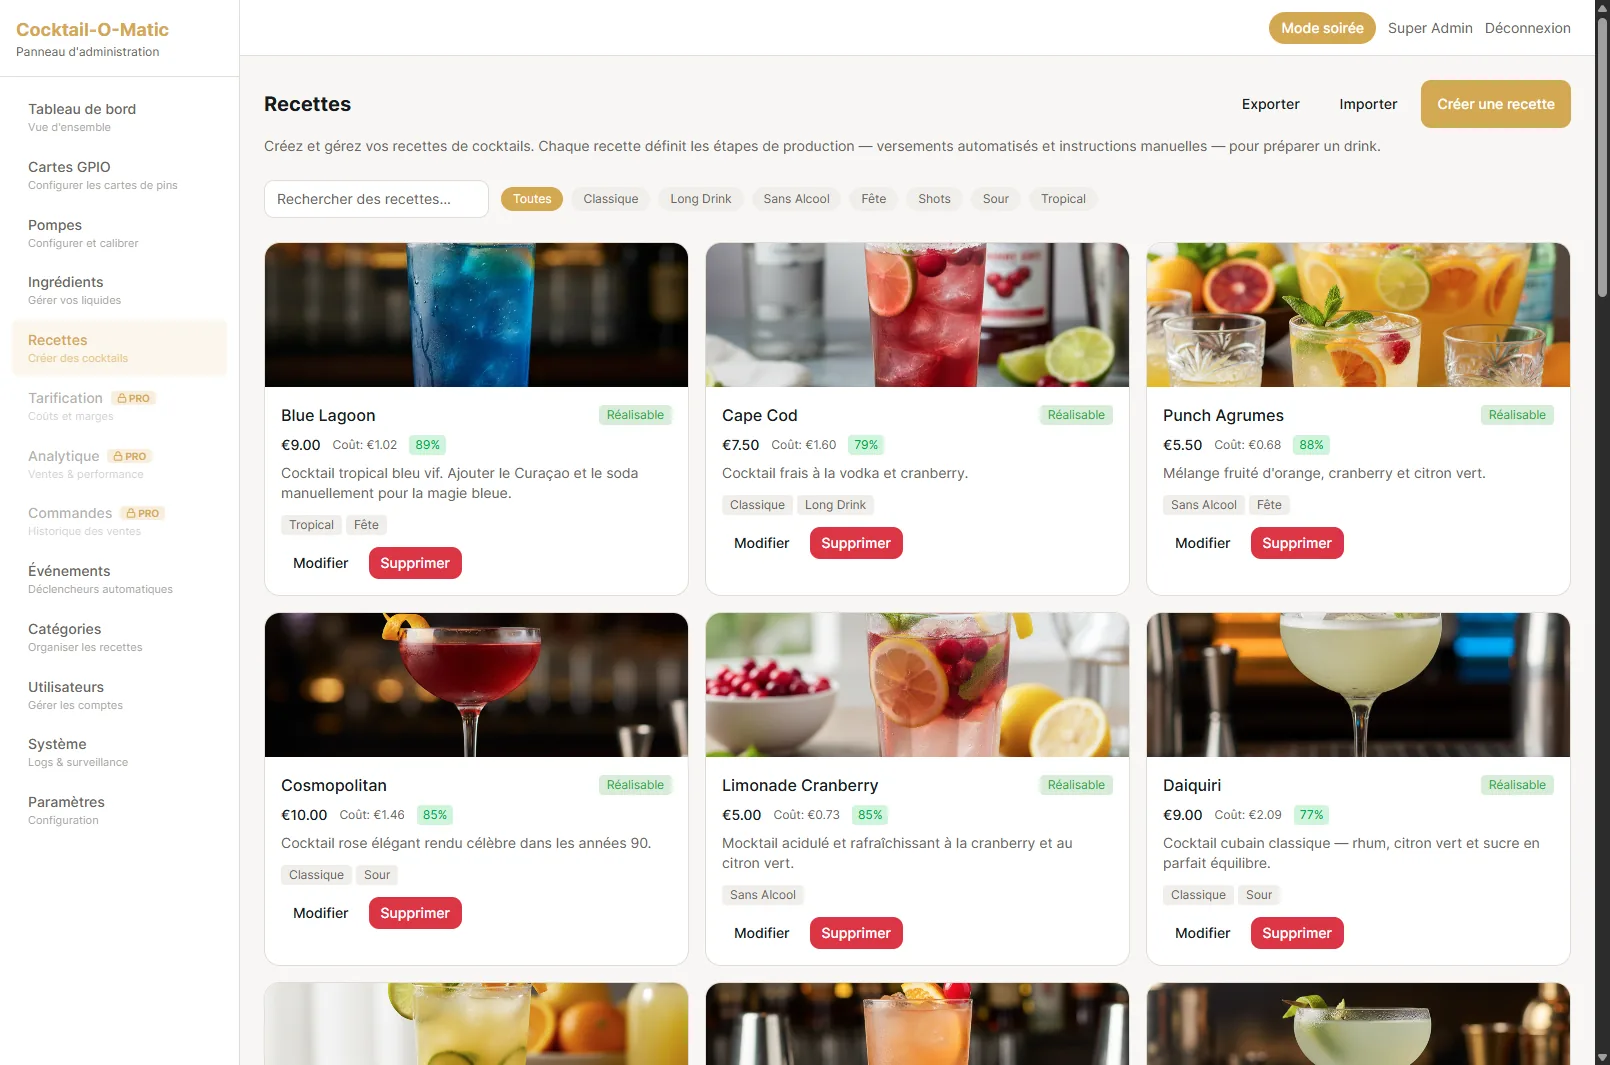
Create and edit cocktail recipes with a visual builder. Each recipe has: name, description, image, category, collection, and production steps. Steps can be automated (pump dispenses X ml of ingredient) or manual (instructions for bartender like 'add ice' or 'shake'). Steps can be reordered by drag-and-drop, run in parallel or series. Import/export recipes as ZIP files with images.
Tip

Use ingredient groups in recipe steps for auto-substitution — if Absolut Vodka is empty but Smirnoff is connected, the recipe still works.

Admin — GPIO & Board Configuration

Configure the I2C expander boards (MCP23017, XL9535) that control your pumps. Each board provides 16 GPIO pins. Set the I2C addresses, polarity (active HIGH or LOW), and test individual pins. The system auto-detects connected boards on startup.
Tip

You can use multiple boards to scale beyond 16 pumps — up to 40+ pumps per machine.

Admin — Pump Calibration

The interactive calibration wizard helps you set accurate flow rates. For each pump: 1) Set the target volume (e.g., 100ml), 2) Run the pump, 3) Measure the actual dispensed volume, 4) The system auto-calculates the corrected flow rate. You can also configure tube volume (how much liquid is in the tube) for accurate priming.
Tip

Calibrate pumps after changing tubing or switching ingredients with different viscosity.

Admin — Event System

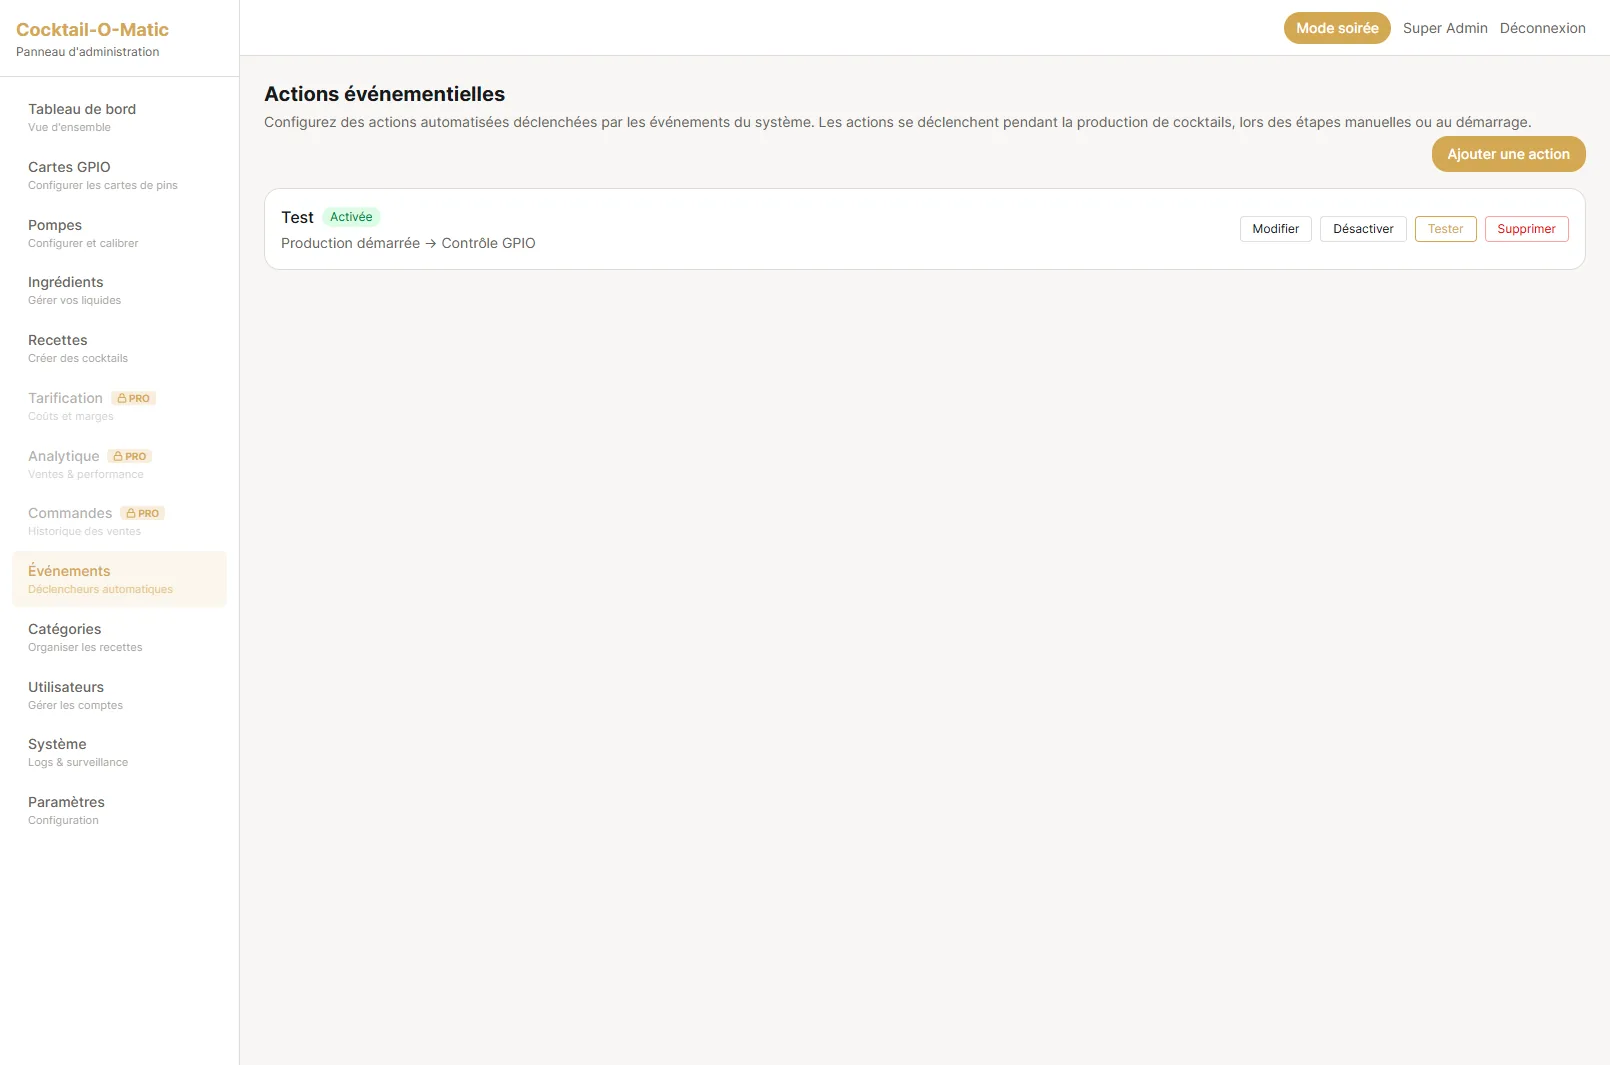
Configure events that trigger actions during the cocktail lifecycle. Events include: order received, production started, step started, step completed, production completed, error. Actions include: play audio, run a Python script, send a webhook, trigger a GPIO pin. Multiple actions can be chained per event.
Tip

Use audio events to play a celebratory sound when a cocktail is ready, or a webhook to update an external display.

Admin — System Settings

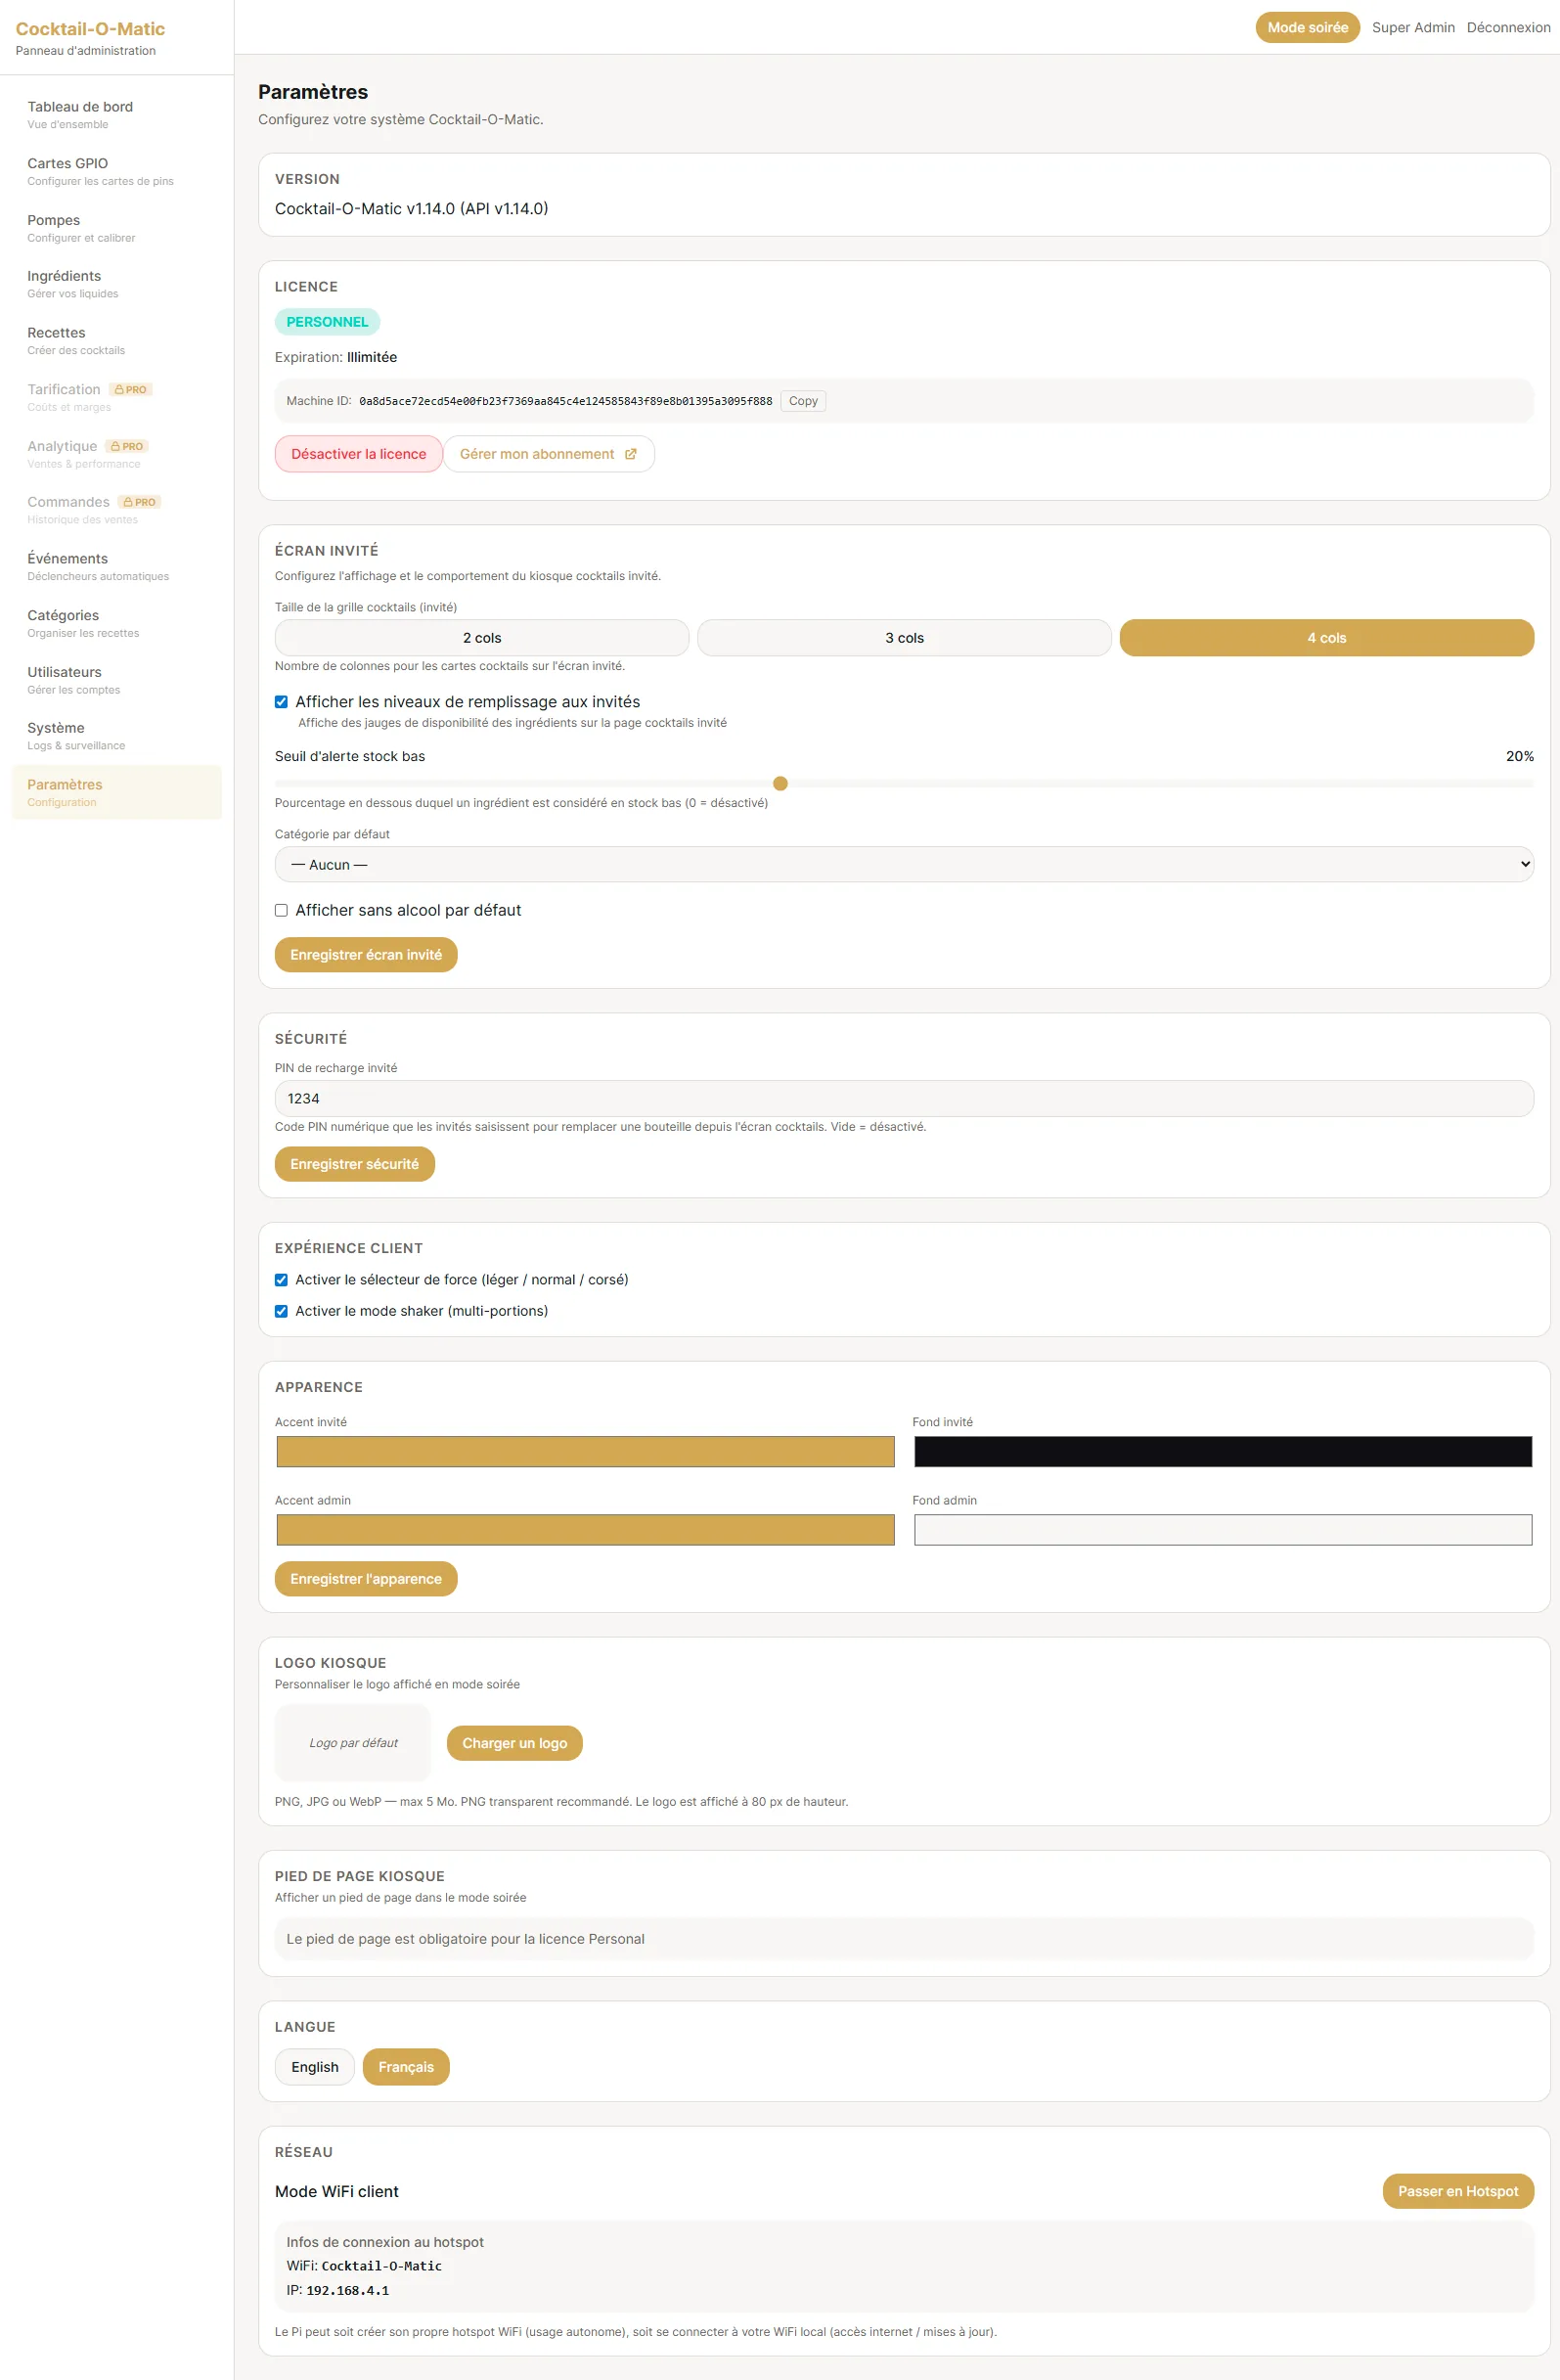
Configure system-wide settings: appearance (guest theme, admin theme, custom logo, branding colors), language preferences, party mode toggle, kiosk mode settings, serving mode (glass vs shaker), production settings (parallel dispensing, power limits). System controls: shutdown, reboot, check for updates.
Tip

Appearance settings let you white-label the machine with your own logo and color scheme — perfect for branded events.

Admin — User Management

Manage user accounts with 5 role levels: Superadmin (full access), Admin (everything except user management), Operator (production control), Editor (recipe/ingredient management), Guest (ordering only). Create accounts with email, password, and role. The role hierarchy ensures users only see features appropriate to their access level.
Tip

For events, create a single Operator account for staff — they can run the machine but can't change recipes or settings.

Admin — License & Activation

View your current license status (Community, Personal, Pro, Event), expiration date, and feature limits. Enter an activation key from the Cloud Portal to activate or upgrade your license. The license page shows which features are unlocked (pump limit, branding, analytics, etc.) and the Machine ID needed for hardware-bound activation.

See License Detail in Cloud Portal for activation key management and hardware binding.

Tip

Your Machine ID is displayed on this page — you'll need to enter it in the Cloud Portal when binding a license to your Pi.

Admin — Cocktail Pricing

Set up pricing for cocktails: enable/disable pricing, set prices per recipe, configure selling prices and view automatic cost calculations based on ingredient costs. The margin dashboard shows cost, revenue, and profit margin for each cocktail. Configure degressive pricing rules for multi-cocktail orders and per-shaker pricing.
Tip

Enable pricing in Settings first, then set individual cocktail prices in the Recipes section.

Admin — Cocktail Analytics

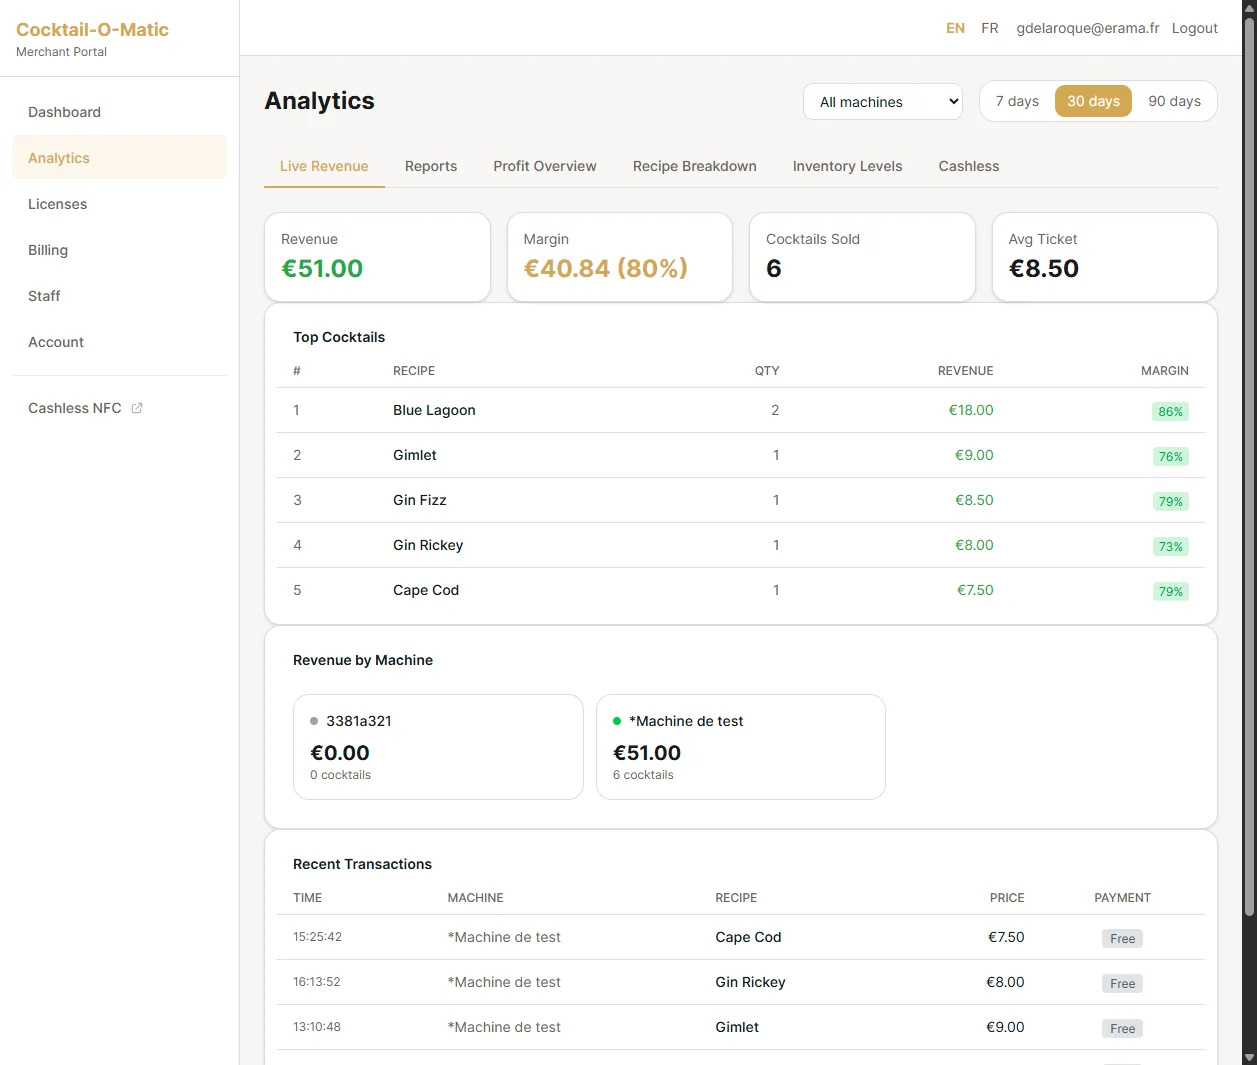
View production statistics: total cocktails served, most popular recipes, production history with date filtering, revenue and profit analytics. Data is synced to the Cloud Portal for long-term storage and cross-machine comparison.

See Analytics in Cloud Portal for cross-machine reporting and CSV exports.

Tip

Analytics data is sent to the Cloud via heartbeat — ensure your Pi has internet connectivity for cloud sync.

System & Configuration

Admin — Order History

View a complete log of all cocktail orders with date, recipe name, price, cost, margin, payment method (Card, NFC, Free), and reference number. Filter by time period (Today, This Week, This Month, All Time). This data is also synced to the Cloud Portal for centralized reporting across multiple machines.
Tip

Use the order history to reconcile daily cash and card payments at the end of an event.

Admin — Categories

Organize recipes into categories for easier browsing. Create categories, edit their names, and translate them into multiple languages (EN/FR). Categories appear as filter buttons on the guest cocktail grid. Each recipe can belong to multiple categories. Delete categories you no longer need — recipes will remain but lose that category tag.
Tip

Create categories like 'Signature', 'Classics', 'Alcohol-Free' to help guests find cocktails quickly.

Admin — System Logs & Monitoring

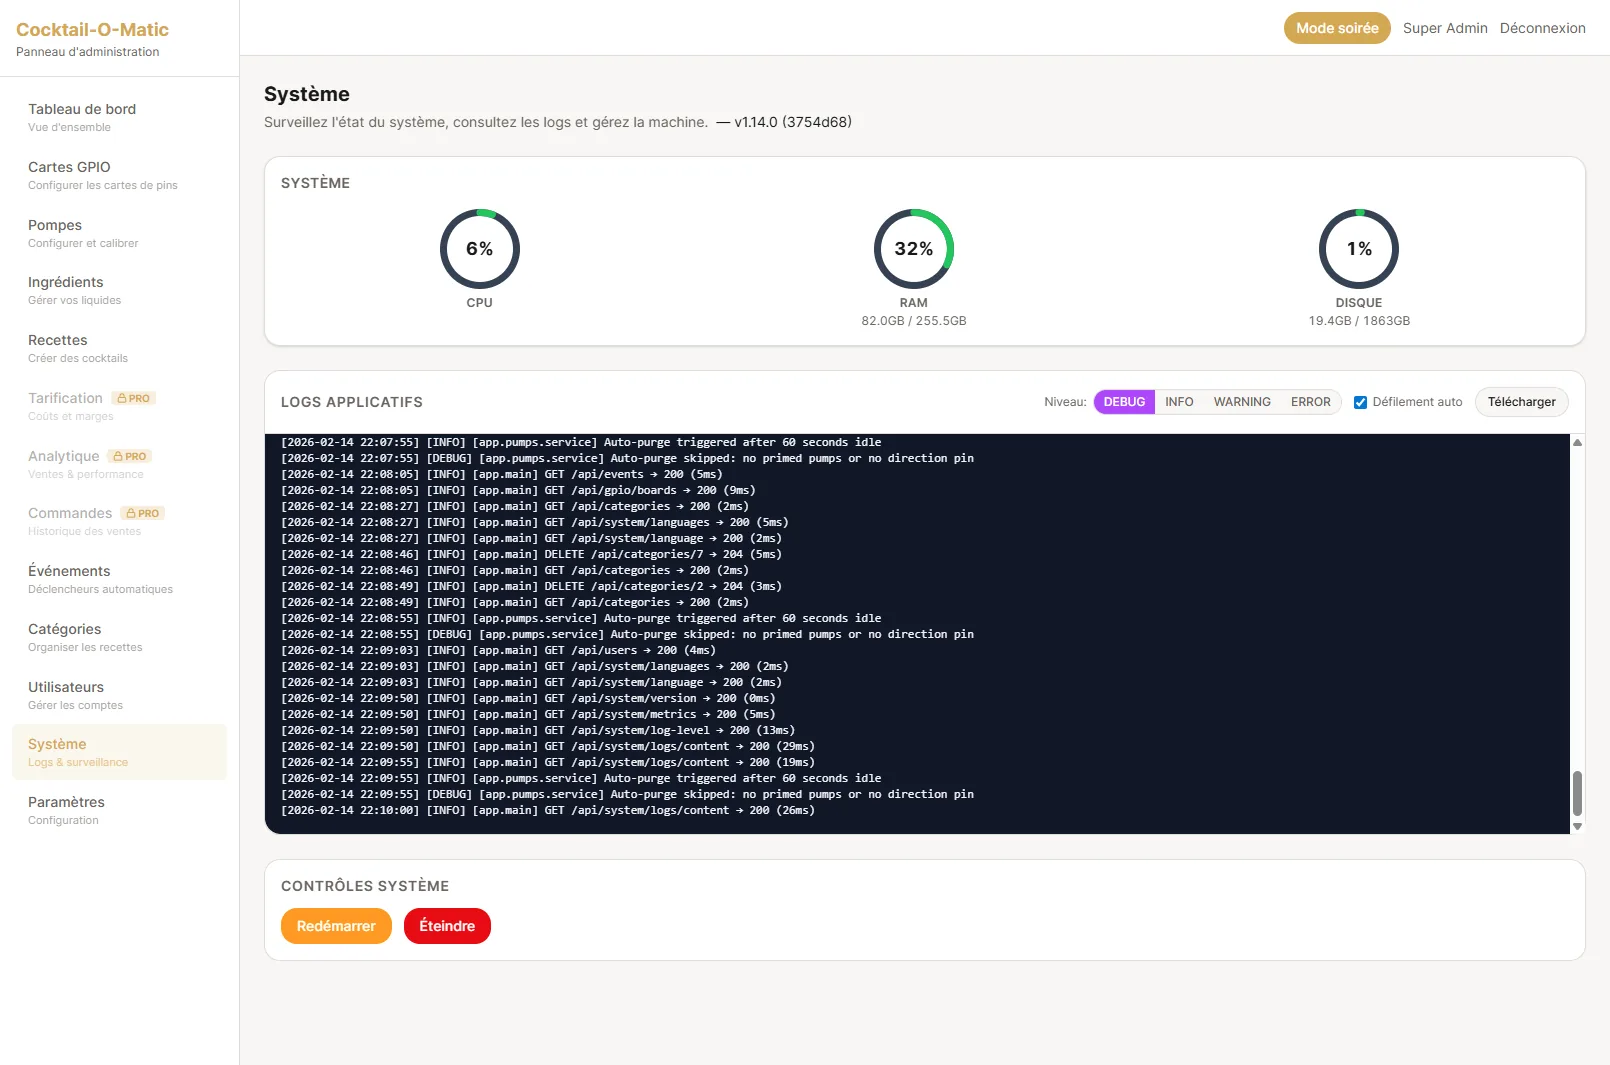
Monitor your Pi's health: CPU usage, RAM usage, temperature, and disk space. The live log viewer streams application logs in real-time with level filtering (DEBUG, INFO, WARNING, ERROR). Auto-scroll keeps you at the latest entries. Download the full log file for troubleshooting. Use the Reboot and Shut Down buttons for safe system control.
Tip

If the machine behaves unexpectedly, check the logs with ERROR filter — most issues are logged with clear error messages.

Admin — Network Configuration

Switch between two network modes: Hotspot (the Pi creates its own WiFi network for direct device connection) and WiFi Client (the Pi connects to your existing WiFi). In Hotspot mode, you see the SSID and password to connect. Enable 'Keep hotspot after reboot' for events where you want the Pi to always start in hotspot mode. WiFi Client mode is required for Cloud synchronization and license validation.
Tip

For events without WiFi, use Hotspot mode — guests can connect directly to the Pi's WiFi to order cocktails from their phones.

Need More Help?

Our team is here to assist you with any question about the platform.