How to build a Raspberry Pi cocktail machine: the complete guide
Pumps, tubing, drivers, calibration and software - everything you need to build a working automated cocktail machine on a Raspberry Pi, and the mistakes that cost people a weekend.
- DIY
- Hardware
- Raspberry Pi
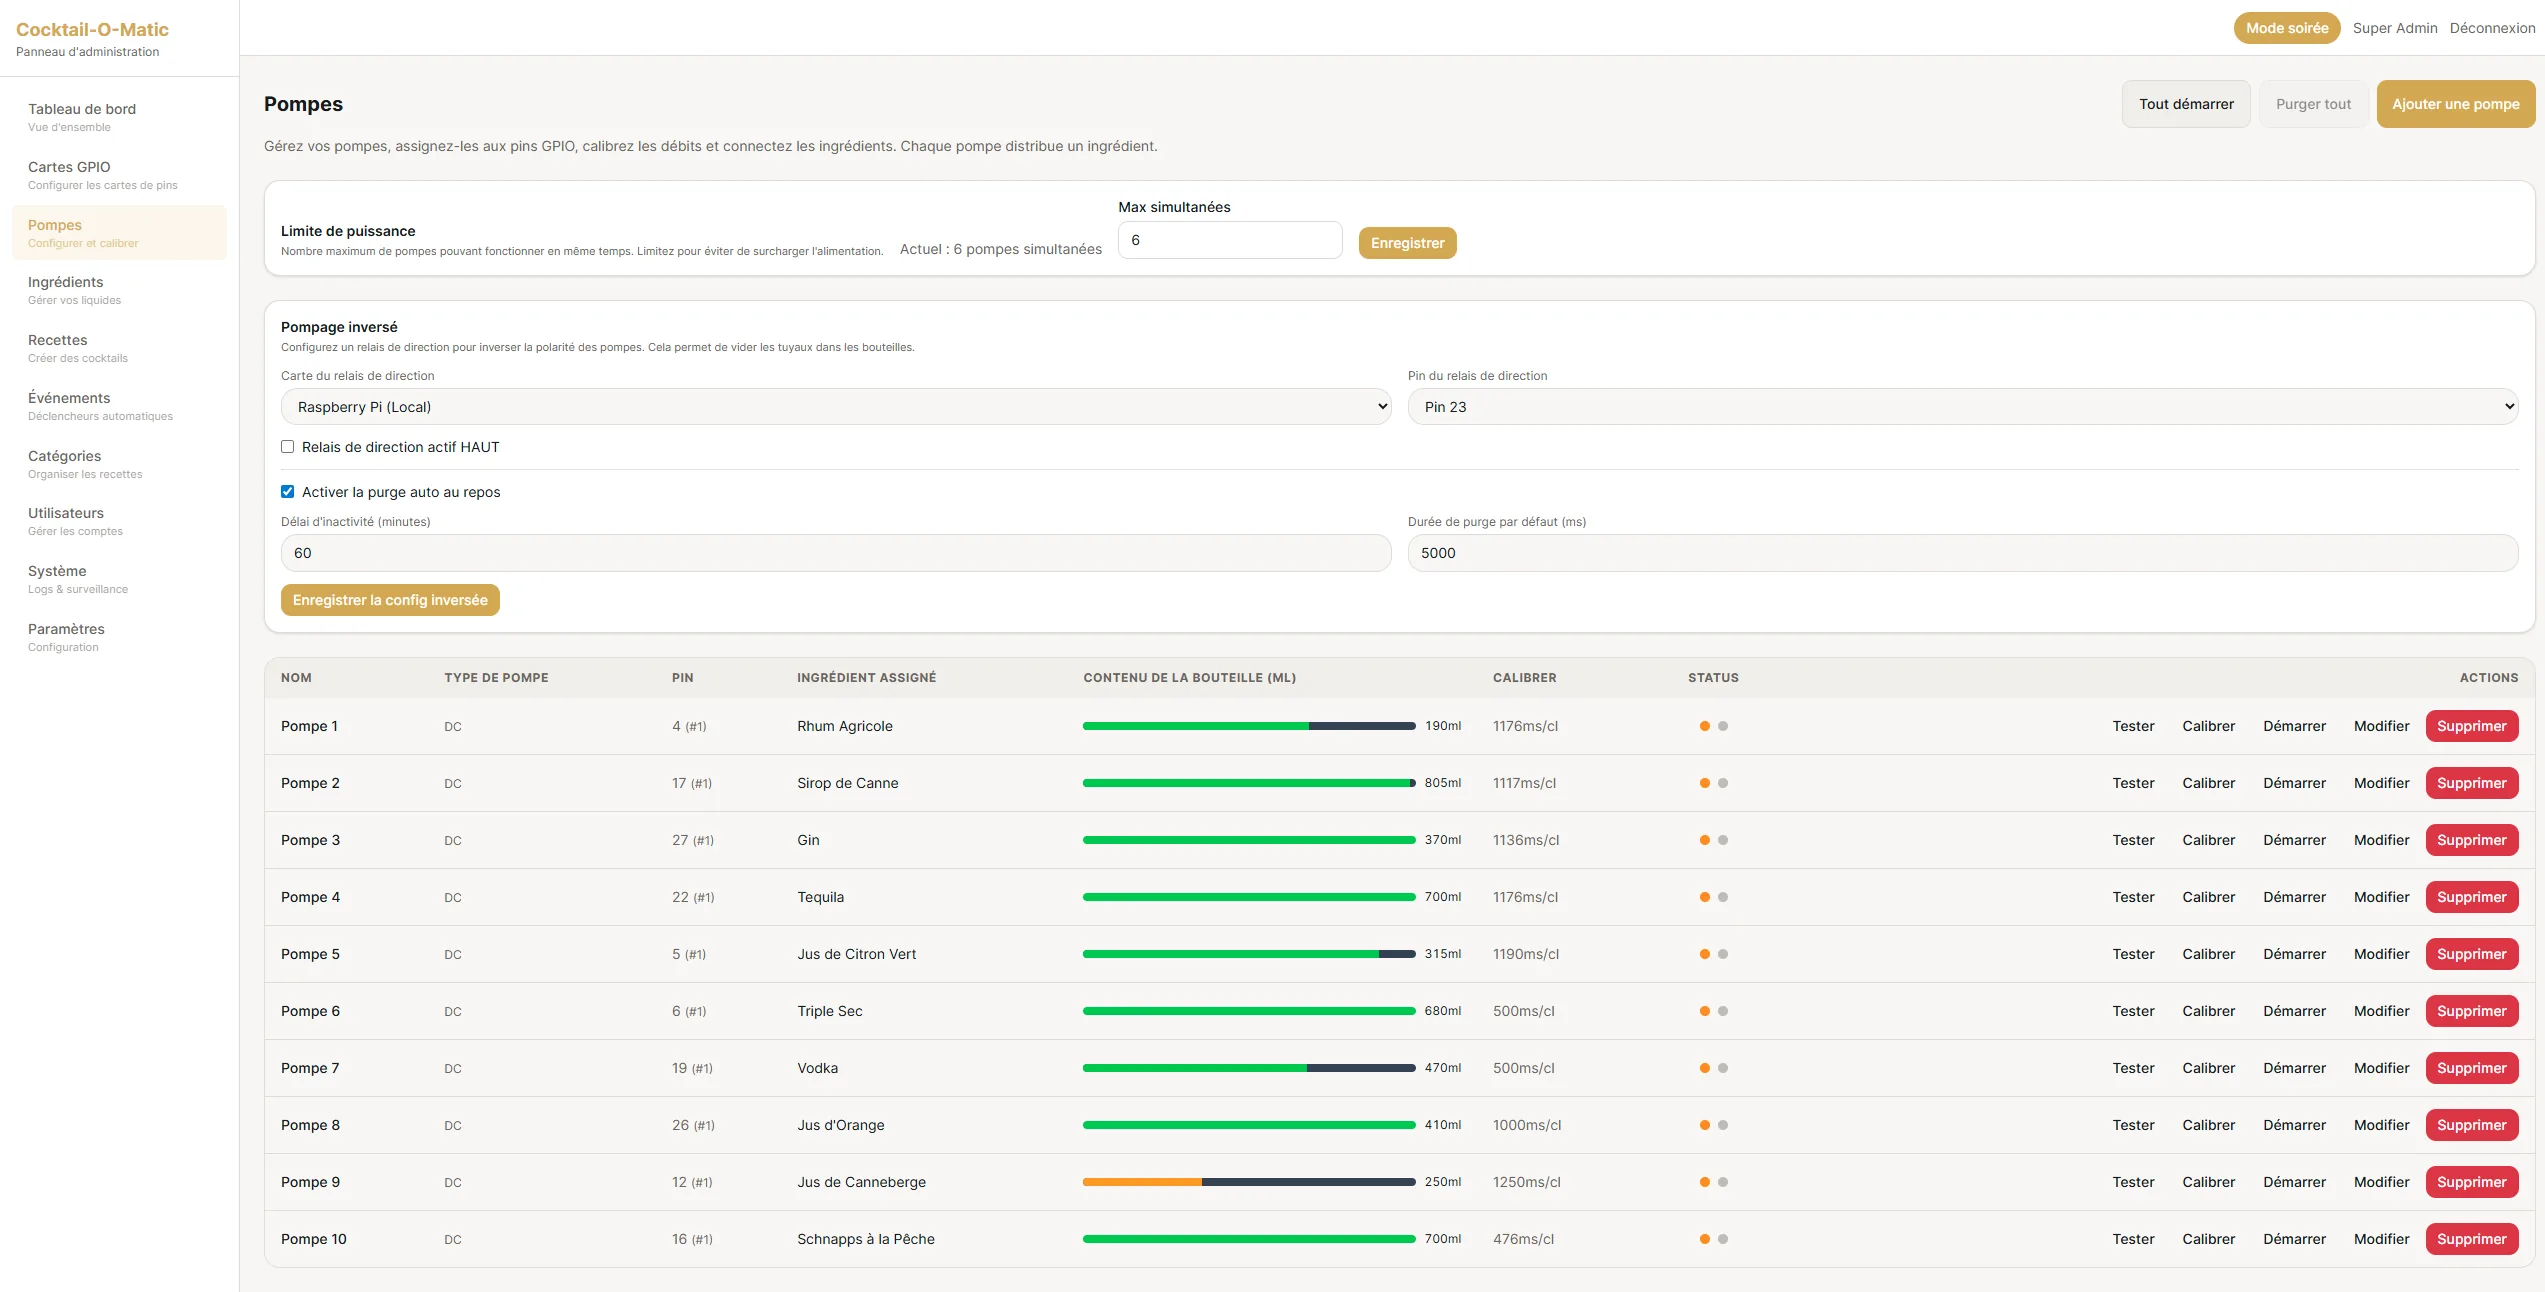
A cocktail machine is a deceptively simple object. You press a button, liquid comes out, and the drink is correct every time. Getting from “some pumps in a box” to correct every time is where most builds stall - usually not on the electronics, but on calibration and on the software that has to survive a room full of guests.
This guide walks through a build that works, in the order you should actually tackle it.
What you are really building
Three layers, and they fail for different reasons:
- Fluid path - bottles, tubing, pumps, nozzle. Fails through leaks, air locks and cross-contamination.
- Control - the Raspberry Pi, pump drivers, power supply. Fails through under-sized power and floating grounds.
- Software - recipes, dosing, the guest interface. Fails through bad calibration and interfaces nobody can use while holding a drink.
Beginners spend 80% of their time on layer 2 because it feels like the technical part. In practice layer 2 is the one with the fewest surprises.
Choosing pumps
This is the decision that constrains everything else, so make it first. Two separate questions hide inside it, and mixing them up is the source of most confusion.
How the liquid moves
The mechanism determines flow behaviour and what a line is good for:
| Mechanism | Flow | Best for | Watch out for |
|---|---|---|---|
| Peristaltic | Slow, very precise | Spirits, syrups, bitters | Slow pours; tubing wears out |
| Diaphragm | Fast | Juices, mixers, soft drinks | Less precise at small doses |
| Gravity feed | Fast, no pump at all | Bulk mixers, high-volume lines | Bottle must sit above the nozzle |
For a first build, peristaltic everywhere is the safe answer. They are self-priming, they do not need a check valve, and they dose accurately at the 10-20 ml quantities that matter for spirits. The cost is speed: a 12 V peristaltic typically moves 100 ml in 30-60 seconds, so a three-ingredient cocktail takes about a minute.
Mixing mechanisms is what a serious build looks like: peristaltic for anything measured in centilitres, something faster for the 100 ml of juice that would otherwise dominate the pour time.
How the software drives it
This is the axis your controller actually cares about, because it decides how a line is calibrated and how many pins it needs. Cocktail-O-Matic configures two:
| Type | Driven by | Calibrated by | Notes |
|---|---|---|---|
| DC motor | Simple on/off switching | Time | The most common case. A peristaltic or diaphragm pump on a plain DC motor |
| Valve | On/off solenoid | Time | No pump: gravity does the work, the valve just opens for a measured duration |
The two axes are independent. A peristaltic pump is usually a DC motor pump, and a valve is not a pump at all - it is a gate on a gravity-fed line.
Getting this right in the software matters because both types dose on elapsed time, which is what makes them sensitive to the power-supply problem described below.
Wiring without regret
The Pi’s GPIO pins switch signals, not pumps. Between them you need a driver board - a relay bank or, better, MOSFET modules - and a separate power supply for the pump rail.
Three rules that save entire evenings:
- Never power pumps from the Pi’s 5 V rail. A single 12 V pump draws several hundred milliamps at start-up. The Pi will brown out and corrupt its SD card.
- Tie the grounds together. The pump supply ground and the Pi ground must be common, or your drivers will switch at random.
- Size the supply for simultaneous pours. Five pumps at 0.5 A each is 2.5 A before inrush. Buy a 10 A supply and stop thinking about it. A line that doses on elapsed time pours short the moment the rail sags, and every line here doses on elapsed time.
Past about 16 pumps you run out of usable GPIO pins. The standard fix is an I2C expander (PCF8574 or a PCA9685 board), which lets one pair of pins address dozens of channels. Cocktail-O-Matic supports I2C expansion up to 40+ pumps for exactly this reason - see the hardware page for how the addressing is configured.
Calibration is the whole ball game
Every pump is different. Two units from the same batch can differ by 15% in flow rate, and the same pump changes as its tubing ages. If you dose by time using a datasheet figure, your drinks will be wrong, and they will drift wrong over the season.
The method that works:
- Run each pump for a fixed duration - 30 seconds is a good compromise.
- Weigh what comes out. A kitchen scale is more accurate than any measuring cup, and 1 g is close enough to 1 ml for our purposes.
- Store the result as ml per second, per pump.
- Re-measure whenever you change tubing, and once a season otherwise.
Dose by volume in your recipes, never by seconds. The moment a recipe says “run pump 3 for 4 seconds”, that recipe is bound to one physical pump on one particular day.
Two second-order effects worth knowing: viscous liquids (syrups, cream liqueurs) flow measurably slower than spirits through the same pump, so calibrate with something close to what the line will actually carry. And the height difference between bottle and nozzle changes flow on gravity-assisted paths - calibrate with the machine in its final position.
The software problem
This is where DIY builds usually stop being fun. A Python script that fires GPIO pins takes an afternoon. What takes months is everything around it:
- A recipe model where ingredients map to pumps, and the mapping can change when you swap a bottle
- Substitution logic, so a recipe still works when one ingredient runs out
- A guest interface that works on a tablet, in a loud room, for someone who has never seen it before
- Stock tracking, so you find out you are low on gin before a guest does
- Not losing everything when the machine loses power mid-pour
If your goal is to learn, write it yourself - it is a genuinely satisfying project. If your goal is a machine that works at a party in three weeks, use software that already handles the boring parts. Our Community licence is free and permanent for up to 5 pumps, which covers the overwhelming majority of home builds, and it runs on the same codebase as the machines we deploy in bars.
A realistic parts list
For a five-pump peristaltic build - the size the free licence covers:
- Raspberry Pi 4 or 5, with a case and a decent power supply
- 5 × 12 V peristaltic pumps with food-grade silicone tubing
- 1 × 8-channel MOSFET or relay driver board
- 1 × 12 V 10 A power supply
- Food-grade silicone tubing, 3 mm inner diameter, plus a few spare metres
- A 7 to 10 inch tablet for the guest interface (any browser will do)
- A frame: laser-cut plywood, aluminium extrusion, or an old drinks cabinet
Budget realistically. Peristaltic pumps are the dominant cost, and the cheapest ones on marketplaces are usually a false economy - they are the units that vary most between samples and wear tubing fastest.
The mistakes that cost a weekend
- Tubing too long. Every extra centimetre is dead volume that has to be primed and then sits there oxidising. Keep runs short and route them downhill.
- No drip tray from day one. There will be drips. Design for them at the start, not after the first spill into the electronics.
- One nozzle for everything. Convenient, but it means residue from the last drink joins the next one. A short flush cycle between pours fixes it; plan for a water line.
- Testing with water only. Water is not gin and it is definitely not syrup. Test with the actual liquids before the actual guests.
- No physical stop. Put a switch that cuts pump power within arm’s reach. When a tube pops off, you want to stop everything in one movement.
Where to go next
If you are building from scratch, the DIY page collects our plans, component notes and the getting-started steps. If you would rather see the software before committing to a build, the live demo runs the real guest interface and admin panel in your browser, with no sign-up.
And if the build works: the same software scales from your five-pump kitchen unit to a 40-pump machine on a festival site. That upgrade path is the whole reason we keep the Community tier free.